
This application will use minimum web traffic. It uses web traffic just to authorize the Facebook/Twitter (only once) and then when ever you update your status on Facebook or twitter.
Disclaimer
This application will not show/collect any personal information (Other than your name, to show on the authorize tab) from your profiles and/or will not contact you through emails.
This application used the Registry to save values (3 encrypted values)
This is a BETA version may have Errors Please report the errors to
You can contact geek@geekiest.net on any doubt /suggestions etc.
Thank you for using Geekiest Social Media Updater
Geekiest Social Media Updater Version 1.0 Beta
oAuth
Update Status of Twitter and Facebook
Update Facebook status with or without Link preview (If you are adding a link in the status)
Upload Photo to Facebook wall
Upload Multiple Photos to Specific Album
Can Hide to Tray
Download Facebook Photos to Computer
Download Geekiest Social Media Updater
Help
Twitter Authentication
1. After opening the Geekiest Social Media Updator, Open the “Authorize” tab
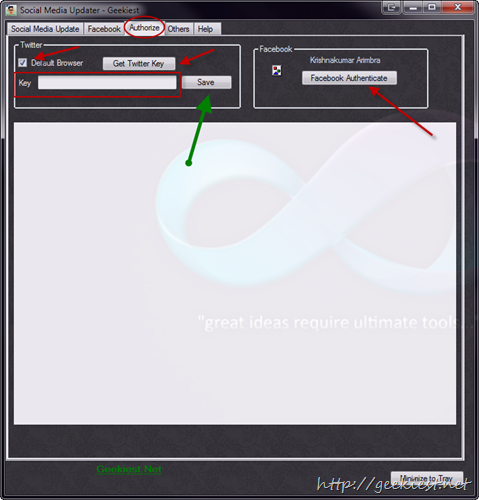
To Authorize Twitter
1. You can choose the default browser or it will load the twitter on the browser in the application itself.
2. Click “Get Twitter Key”
3. Enter your twitter name and Password anc click “Authorize app”
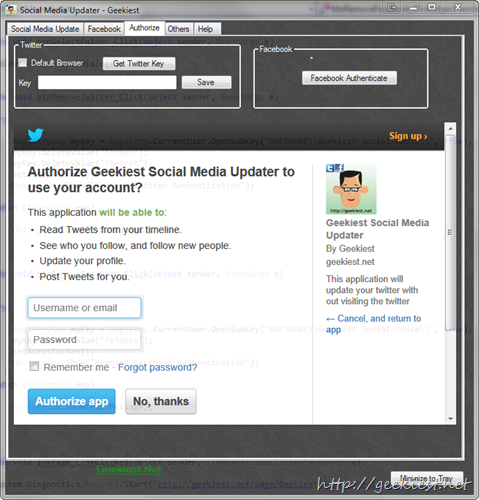
4. It will Display a number copy and Paste it to the “Key” field in the application and click “Save”
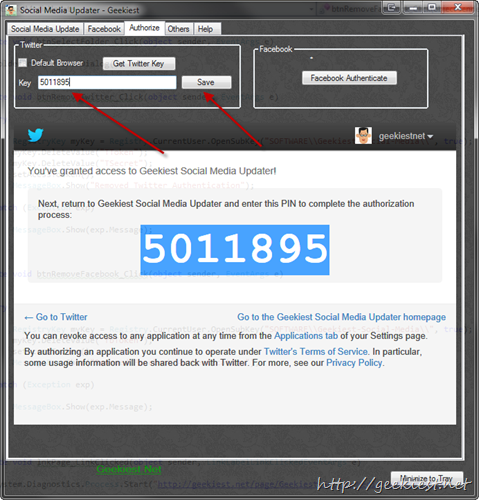
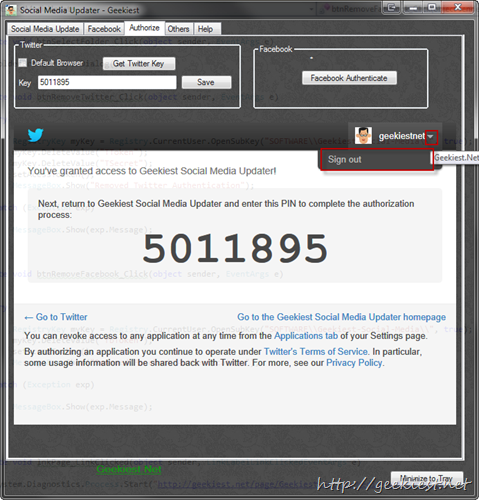
5. After Saving you can Sign-out the account (If you are using the browser in the application
Facebook Authentication
1. On the Authorize tab click “Facebook Authenticate”
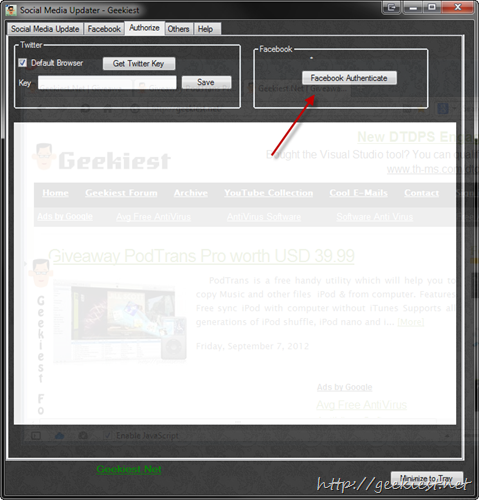
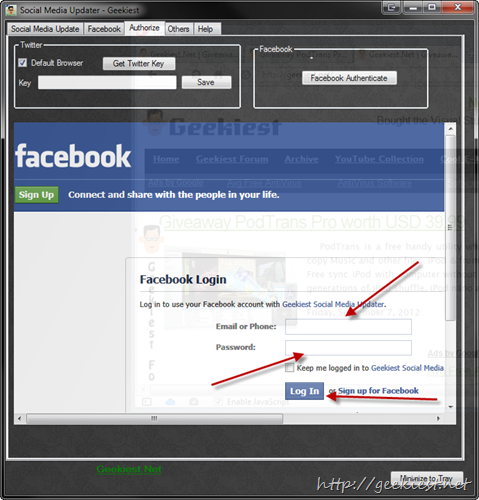
2. Login with your Facebook details and click Login
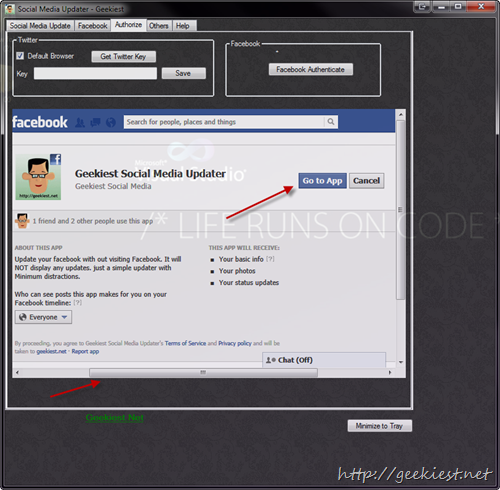
3. Scroll a bit and Click “Go to App”
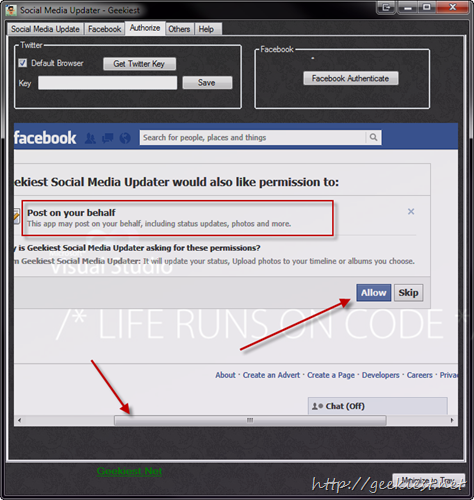
4. Scroll and Click “Allow” (Don’t forget to read the permissions)
5. Status of authentication will be displayed on the Screen
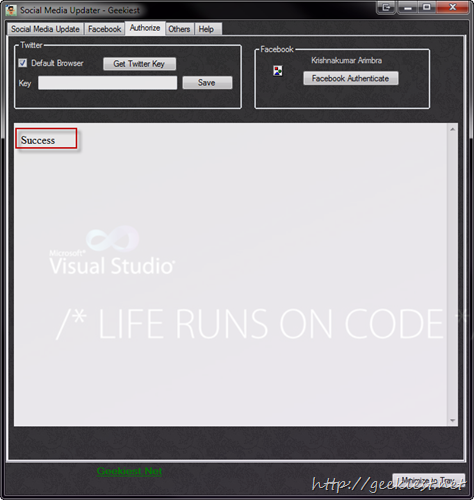
To Remove the Authorization
1. Click on “Others” Tab
2. Click on “Remove Twitter Authorisation” or “Remove Facebook Authorisation”
To Update a Status
Open “Social Media Update” Tab
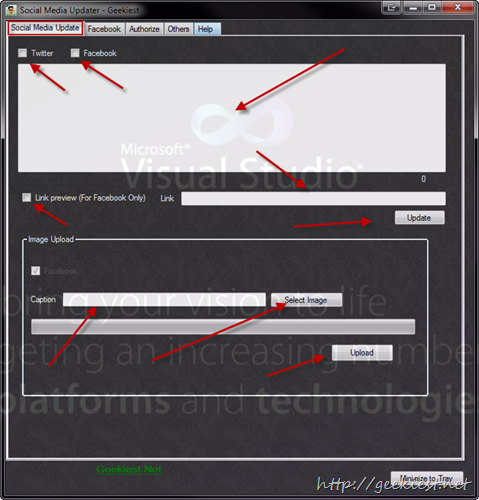
To update Status,
i. first choose Twitter or Facebook or Both
ii. Enter the status and link (Link can be in the status box)
iii. Click Update button
To Upload an Image (To facebook Wall)
i. Enter Caption if any
ii. "Click “Select Image” and choose the image need to be uploaded
iii. Click “Upload” button
To Create an Album in Facebook
Open the Tab “Facebook”, Enter the Album Name and Description and Click “Create” button.
To Upload Multiple Images to a Facebook Album
Open the Tab “Facebook”
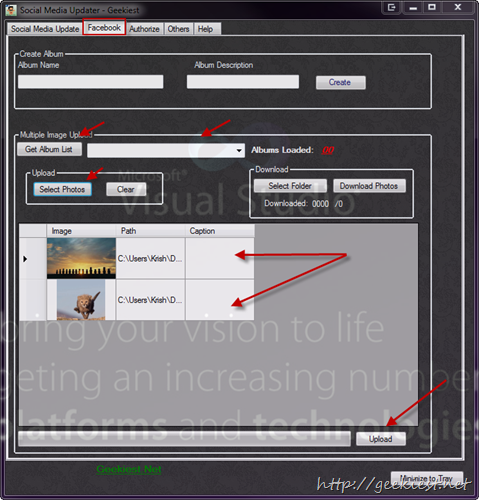
1. Click “Get Album List” this will load the list of albums to the drop down
2. Choose the album
3. Click “Select Photos” and selected the photos (You can do this step more than ones, the new selection will upend with the current selection)
4. Double click on the Caption column to add caption for each Photo
5. Click Upload button.
To Download Photos From Facebook
Open “Facebook” Tab
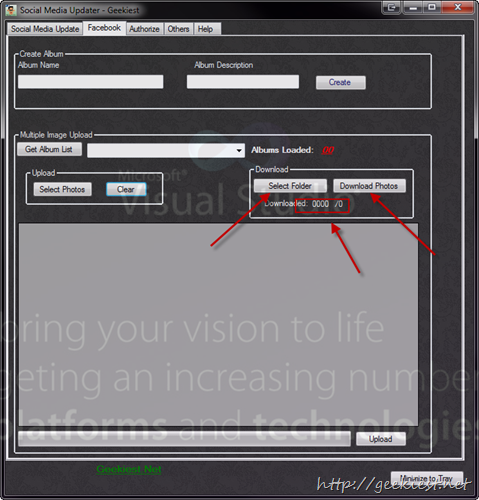
1. Click “Select Folder” and choose where you want to save the Photos
2. Click “Get Album List” this will load the list of albums to the drop down
3. Choose the Album you wanted to download
4. Click “Download Photos”
5. You can see the status Just below the buttons.
You can click the “Minimize to Tray” button to hide the Geekiest Social Media Updater to the Tray.
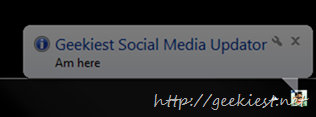
Double click on the tray icon to show the Application Screen